I love silhouettes of just about anything. I think they are simple, timeless, and classy. Of course you could spend a lot of time with tiny scissors and exacto knives, or you could spend a fair amount of time with your computer making a digital silhouette. Below are the steps I took to create a silhouette on Pixlr.com (my new favorite, FREE, online photo-editing software).
1. Go to www.pixlr.com and click on "open photo editor".
2. click on:

4. Click on Paint Brush


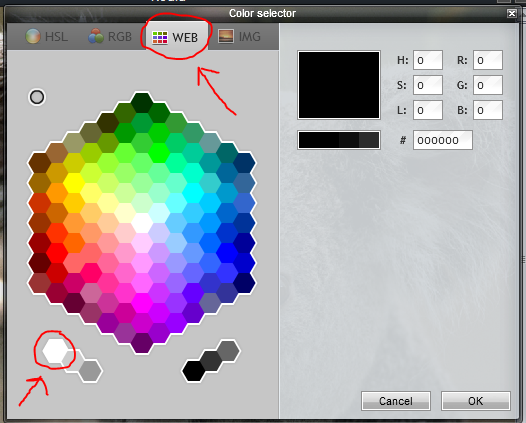
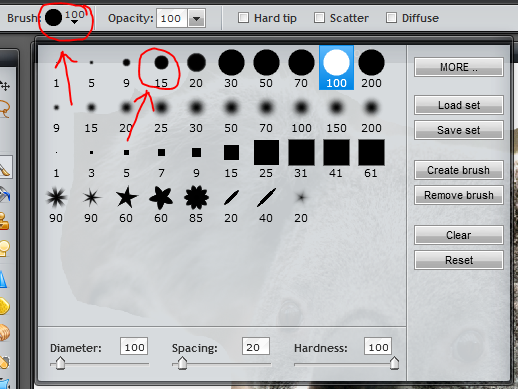
7. First click on your paint brush options, then click on a a large brush size with a smooth edge. Click "OK". Click on your "paint brush" to get out of the options box.

8. Begin filling in the spaces that you don't want to show in your silhouette. Be careful not to get too close to your image (we aren't ready for that yet).

9. Now you will zoom in really close on your picture and fill in the rest of the space. First you need to go and change your brush size to a small brush, and then zoom in on your image and start outlining your shape and filling in the rest of your white space. The smaller the brush, the more precise your lines are going to be.

Use the navigation pane on the top right to zoom in on your image. Use the sliders on the bottom and the side to move your image around as you work. Make sure you aren't scared to use "Edit" -> "Undo". Take your time and get as close as you can to the edge of your image with your white paint brush. Fill in all the outside white space as you go.


12. Zoom out, change your brush size back to large, and fill in your silhouette.

Now you are ready to print! Of course this is not that great of an example because I just chose a random image and was doing it quickly for the purpose of this tutorial.
I did learn a few things along the way while I was working on my silhouettes that I would like to share with you.
1. Take your time and don't be scared of the edit, undo buttons.
2. You will learn which way your hand is steadier - go with that - for example, I found out I do better pulling the mouse to the left or down. I get a little shaky going up or to the right, so I worked my way around the shapes so that I could always pull down or left.
3. Use a couple of different images. I was amazed at how different the images looked as silhouettes and the pictures I originally wasn't a fan of turned out to be my favorite silhouettes!
4. Lots of "fly-away" hair is really hard to capture in a silhouette. If you your pet or child had fuzzy or curly hair, a side profile might work best.
Have fun! Stay tuned to see how I use my silhouettes in my super secret project!
No comments:
Post a Comment